Monday, December 26, 2011

End of Year Clearance Sale

'Tis The Season of Giving...

yourself the scrappy present you really wanted!
Visit Mollys Scrapbook Supply now and

Save 20% during the
End of Year Clearance Sale!


Use coupon code " ENDOFYEAR20 " to save 20% off your purchase!!!
Offer Valid December 25, 2011 through December 31, 2011

(percent off taken before tax and shipping charges.
must apply coupon code during checkout to save)


Click to go shopping now!

 
Pin It

Saturday, December 24, 2011

Merry Christmas!

Merry Christmas Everybody!

I'm back with the last of my Holiday cards using the 
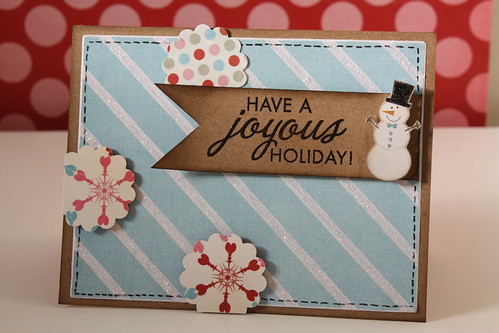
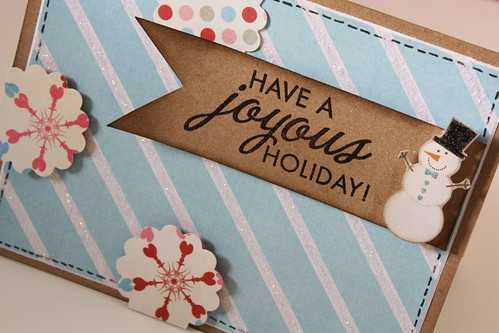
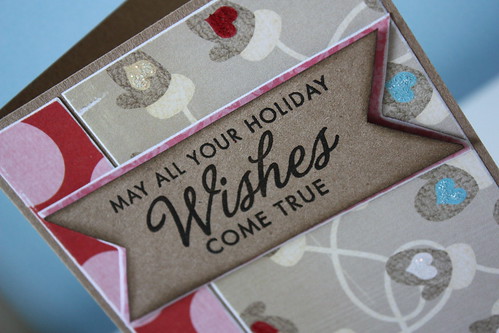
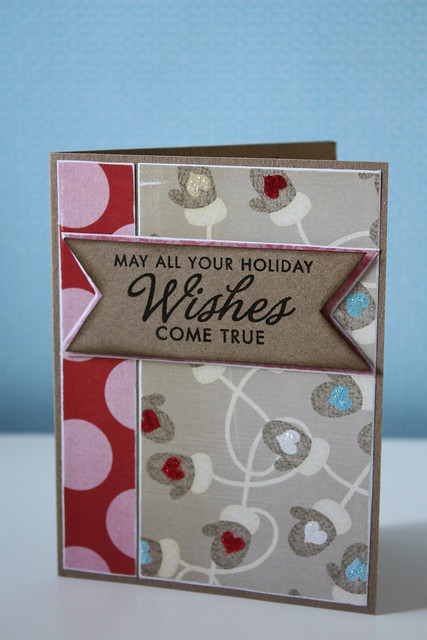
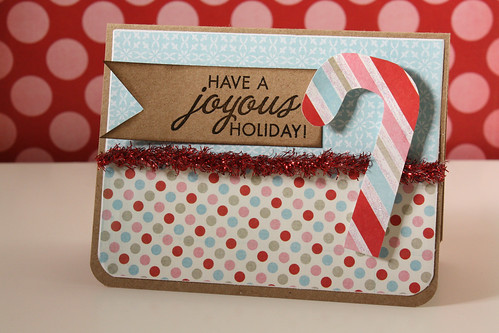
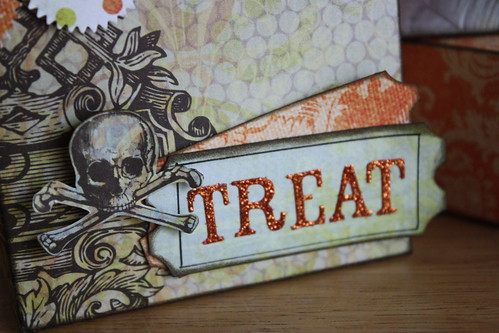
Snow Day patterned papers by Pink Paislee! Again, I used only the patterned papers. I started with the B side of the 
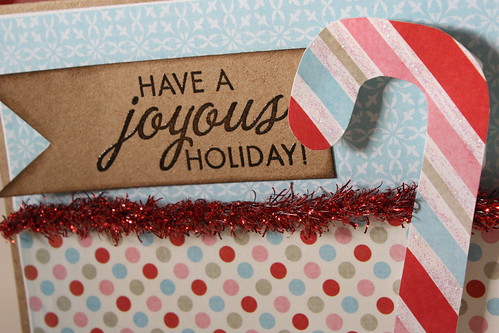
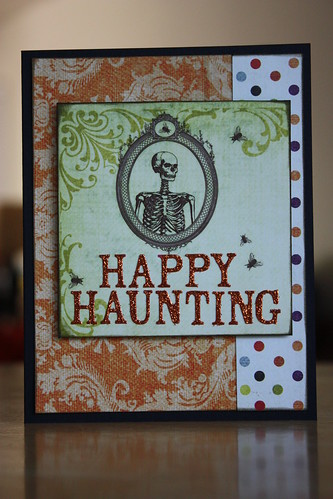
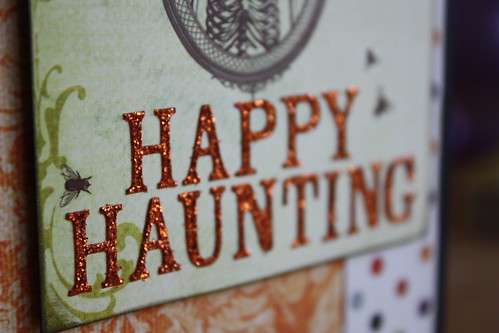
Hot Cocoa patterned paper and then added some lovely and shinny glitter to the white portions of the paper. Next, I stamped and embossed the sentiment, inked it and adhered it using foam adhesive.

IMG_2645

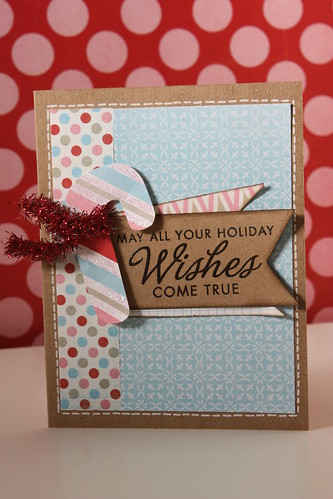
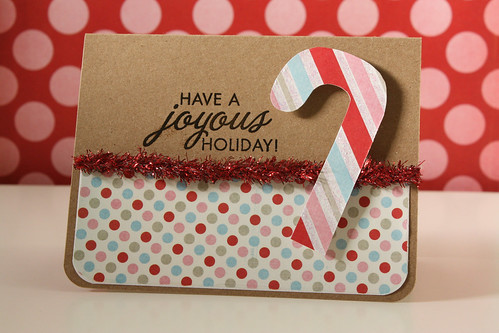
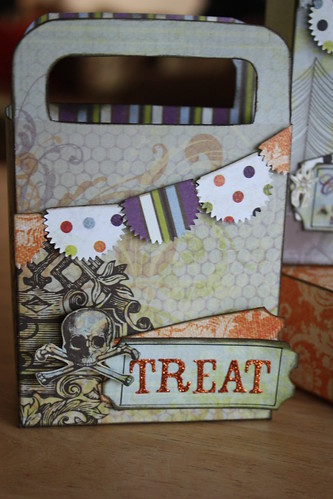
I wanted to add the cute little snowman so I cut him from the Frosty patterned paper and added some glitter to him as well! And of course adhered him with foam adhesive! I then used my black zig pen to draw faux stitching around the outside of the card, however I should have used a different pen as it didn't work so well over the glitter... I may have to actually learn how to use my sewing machine! I then thought the card was missing something and so I added the punched scalloped circles and voilĂ  all done.

IMG_2647


Since it is Christmas and I am in a giving mood I thought it was time for the 
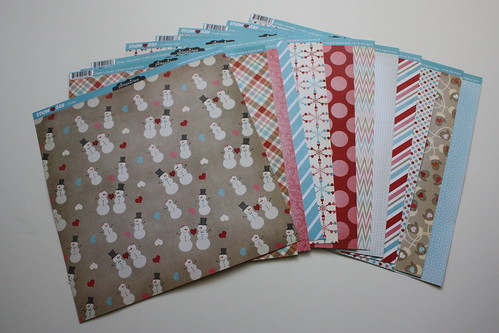
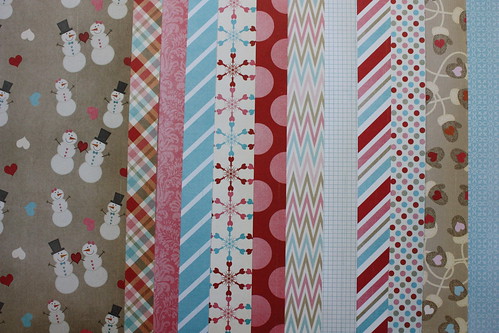
giveaway! One lucky Mollys Scrapbook Supply Blog reader is going to win a set of... you guessed it... Snow Day Papers!!! Just in time to scrap your Christmas and Winter adventures or save and use for fun Valentines projects and cards... you will win 12 sheets of 12x12 patterned paper, 2 of each design!


IMG_2163
IMG_2160 

 To enter comment on this post answering the following question: 
What are your current favorite scrapbooking companies and/or products?

You can comment up 3 times! One for each of the following: 
♥ Follow the Blog and Leave a Comment on this post 
♥ Subscribe to our mailing list and Leave a Comment on this post 
♥ Put a link to this post on your blog, facebook, etc, and Leave a Comment on this Post.

You have until Saturday December 31, 2011 to enter and I will be back in 2012 to announce the winner! Good Luck &  Merry Christmas!


Pin It

Christmas is Almost Here!!!

Can you believe Christmas is almost here? I for one can't! While I take a break from all the Christmas preparations I thought I would share another one of my Holiday Cards I made using the Snow Day papers by Pink Paislee! This card could easily be turned into a New Years card or a winter themed card by changing the sentiment! I really love this paper... so cute and versatile!

IMG_2661

I love glitter so I had to add some to the cute little hearts on the mittens! The extra glitter really makes the card shine and the embossed sentiment, distressed edges and inking around the sentiment add that "something extra" since the card has no embellishments at all! Sometimes it is fun to just play with paper and see what you come up with!

IMG_2660 


Check back soon for one more Holiday card! Yes, I still have one more card to share!

Merry Christmas Eve!  May All Your Holiday Wishes Come True! 


Pin It

Wednesday, December 14, 2011

*Sweet* Holiday Cards - Part 2

Hello!

Today I have another *sweet* card to share with you! Similar to my last post so I wont go into tons of detail...

IMG_2638

Ok maybe just a little! I used the Snow Day papers by Pink Paislee and Old School Vintage Tinsel Ribbon by Pink Paislee as well. Did a little embossing for the sentiment, added some glitter to the hand cut candy cane, used a bit of distress ink and also added some white faux stitching. I love the Snow Day patterned papers! Perfect for winter and Christmas cards and versatile enough to use on everyday layouts as well. I can't wait to use this line to make some pages about my kids!


IMG_2635

If you still need to do a little Christmas shopping or maybe want to buy yourself a gift there is still time! If you've ordered from me before you know I ship orders out fast! Usually within 24 hours! And since it is the season of giving here is a coupon code for Blog readers! Use coupon code MERRYSAVINGS10 when checking out to save 10% expires 12/19

Happy Holidays! Pin It

Friday, December 9, 2011

*Sweet* Holiday Cards

Hello All!

Today I have some very *sweet* Holiday cards to share with you. I used the patterned papers from the Snow Day collection by Pink Paislee and the Vintage Tinsel from the Old School collection also by Pink Paislee to create these cute cards. I really love the Vintage Tinsel Ribbon on these cards I think it works so well for Christmas and Holiday themed projects! Just because it is from the Old School line doesn't mean you can't use it on other projects!
So, here are the two cards I made...

IMG_2627

IMG_2632

Both versions started out the same. Kraft cardstock with rounded bottom corners,  Fireside patterned paper with rounded bottom corners and sanded edges, tinsel ribbon and a cute candy cane cut from the Fireside paper. After cutting the candy canes out I added some glitter and then adhered them to the cards with foam adhesive. Now, this is where the two cards differ! Version one I stamped the sentiment directly on to the card base and heat embossed it but since I am not always the most careful stamper and embosser I thought I would change it up for the second card!

IMG_2633

On version two I added some of the Warm Mittens patterned paper to the top of the card and again sanded the edges of the patterned paper. This time I stamped the sentiment on to kraft cardstock and heat embosed it before adding it to the card! Before adhering the sentiment to the card I inked the edges of it and then made sure to leave the"ribbon" edge free from adhesive. It adds just a bit more dimension and interest to card this way!

IMG_2634

So there they are! Two cards very similar and both easy to mass produce. Version one is pretty simple  and will stretch your supplies making it easy to make cards for everyone on your Christmas list! Version two has a few more steps but great if you do not want to stamp directly onto the card!

Thanks for taking a look at my *sweet* Holiday cards! Stay tuned as I have a few more Holiday cards and layouts to share with you in December. (Plus, you never know when there might be a giveaway!) Pin It

Tuesday, December 6, 2011

October Afternoon Holiday Style & Farmhouse

I'm so excited! October Afternoon Holiday Style & Farmhouse collections are now in stock at Mollys Scrapbook Supply! I love these lines but then again I love everything October Afternoon! Don't you?!!?


Pin It

Friday, November 25, 2011

Gobble Gobble Sale Time!

It is Black Friday and that means it is shopping time!! Now that you are done with the hectic door busters and busy crowds relax and shop at Mollys Scrapbook Supply!!! From now until Monday night save 20% off everything in the shop!!  Just use the coupon code " GOBBLEGOBBLE20 " at checkout to save 20%  

I've added tons of new items too all at great prices... and guess what you can use the coupon on them too!! 
Here are just a few of the new items:


Hope you all had a wonderful Thanksgiving! Now, Happy Shopping!

Mollys Scrapbook Supply


Pin It

Sunday, November 20, 2011

Gobble Gobble Shopping Time!

Just a heads up for those who take the time to read my blog... I am offering 20% off EVERYTHING at Mollys Scrapbook Supply for Black Friday and Cyber Monday but for those who actually take the time to read my blog you can get the discount NOW! Just use the coupon code " GOBBLEGOBBLE20 " at checkout to save 20%

Happy Thanksgiving! Pin It

Tuesday, November 15, 2011

Basic Grey Picadilly Inspiration

I was doing some browsing on the Basic Grey Blog and found some really cute projects using the new Picadilly line! I just had to share them! If you would like more info on any of the projects be sure to check out the Basic Grey Blog! Now lets look at some cards and layouts...


What I love about all the layouts is the way the patterned paper was cut into smaller pieces. The hearts, "ribbon" border, and hexagons... all so genius and pretty! That is such a great way to use the 6x6 paper pad! All these projects are so so pretty but I think my favorite just might be the card with the little bird. I love the idea of using the bird from the layered stickers and putting him on a branch cut from the patterned paper. Plus, I'm a sucker for anything with a heart on it... So Cute!

If you would like to get your hands on some Basic Grey Picadilly check out Mollys Scrapbook Supply now!

Happy Scrapping!  Pin It

Friday, November 11, 2011

Jenni Bowlin - Now at Mollys Scrapbook Supply!

I'm so excited to announce that Jenni Bowlin products are now in the shop!! I've add the awesome acrylic stamps and will be adding tons of the beautiful embellishments very soon!


Check out Mollys Scrapbook Supply to see what is new!!

♥ Happy Shopping! Pin It

Tuesday, November 8, 2011

Easy Ticket How To

Hello!

Today I thought I would share a simple "how to" on the tickets I made for my Halloween projects. They are so easy to make and could be used on any project just change the patterned paper and embellishments and you have a super cute and simple embellishment perfectly matched to your project. For these tickets I used the Hocus Pocus Paper and Press Ons from the Hocus Pocus line by Pink Paislee. 
Hocus Pocus Ticket


Step 1: Cut a piece of patterned paper or cardstock into a rectangle. Mine is about 2 1/4 x 1 inch.
Hocus Pocus Ticket 1


Step 2: Use a small circle punch on each corner making sure to only place the pp partially into the circle punch. Make it easy by turning your punch upside down to see where you are punching!
Hocus Pocus Ticket 2


Step 3: Use a standard size hole punch to make the "notches" on either side. Place pp about half way inside punch. 
Hocus Pocus Ticket 3


Step 4: Embellish as desired. I drew a black line inside the ticket to make the rectangle, added a few rub-ons from the Hocus Pocus Press ons and then used some distress ink around the outside.
Hocus Pocus Ticket

There you go! Super cute and easy to make tickets! And just for fun I'm having a sale until Friday! Save 15% off EVERYTHING at Mollys Scrapbook Supply. Use coupon code " JUSTFORFUN15 " at checkout to save 15% 

Have a great day! Pin It

Wednesday, November 2, 2011

Giveaway Winner!!!

We have a winner to the Hocus Pocus Giveaway!!


Little Buttercup Baby said... What a cute Giveaway!!! I'm following you now :) 


Congratulations! I'm off to send you an email now!
Thank you to everyone who entered and keep an eye out for more giveaways!
Pin It

Friday, October 28, 2011

Halloween Treat Bags

 Hello Everyone!

Halloween is almost here so here is "part two" of my Halloween craft projects! I thought it would be fun to make a few treat bags for the kids! I found a template for the bags with cute little handles that I knew my kids would love and then cut the bags out using the paper from the Hocus Pocus Paper Kit by Pink Paislee. You can find tons of templates for the bags with a quick Google search or you could use a die cutting machine to make cutting them even easier! I also used the Hocus Pocus Press Ons and Glittler Alphas. Here they are:

Hocus Pocus Treat Bags 1

Since these are for the kids I limited my supplies to the Paper, Rub-ons, and Alphas. Also, I didn't want to use a ton of embellishments on them but I wanted them to be cute so I used mostly the patterned paper for the embellishments doing some "fussy" cutting. Below you can see the crow that was cut from the patterned paper.

Hocus Pocus Treat Bags 2

Below are the tickets I made using the pp and the little spider rub-on who was applied to pp and then cut out.

Hocus Pocus Treat Bags 3

Next you see the skull that again was cut from the pp and more tickets I made plus the glitter alphas.

Hocus Pocus Treat Bags 5

And finally the festive banner..which was really easy and simple to make using a punch and then cutting the shape in half. I also used lots of foam adhesive on these just to add some interest since they were mostly made from paper! 

Hocus Pocus Treat Bags 4


And there you have it...some cute little treat bags for the kiddies or anyone else because who doesn't love treats?

Don't forget you can still enter the giveaway! Just comment on the Giveaway post and make sure to follow the blog...you must be a follower to win! I'll be back after Halloween to announce the winner!! 


♥ Have a great weekend and Happy Halloween! Pin It

Thursday, October 27, 2011

Pink Paislee Snow Day

Available now Snow Day by Pink Paislee!! I love, love, love this new winter/valentine's day themed line from Pink Paislee. Just look at that adorable snow-couple! This line has tons of pink, red and yes it even has blue! A few sheets of the 12x12 paper even has a blue B side! Snow cute!! (Sorry, I couldn't help myself!)
Pin It

Tuesday, October 25, 2011

Basic Grey Picadilly & Little Black Dress

WooHoo The new lines from Basic Grey are now in stock at Mollys Scrapbook Supply!


Pin It

Monday, October 24, 2011

Giveaway and Coupon Code!!!

Good Morning All!

Halloween is almost here and so I thought it was time for a Giveaway!! One lucky person will win a Pink Paislee Hocus Pocus 12x12 Paper and Sticker Kit just in time to scrap all your Halloween photos! Kit includes 12 papers (2 each of 6 designs) and 2 coordinating sticker sheets.


All you have to do to enter is follow the blog and leave a comment on this post! Want an extra entry? Put a link to this blog post on your blog, facebook page, etc and leave a link to it in the comments. (You can leave two comments total) You have until the end of Halloween night to enter!  And just for fun here is a coupon code for blog readers!     HALLOWEEN10 Use it at check out to save 10% off your total purchase!! Good Luck!!
Pin It

Sunday, October 23, 2011

Halloween Cards

Good Afternoon!

I had a chance to "play" with the Hocus Pocus line by Pink Paislee and I had a lot of fun creating some  Halloween Projects! Today I want to share with you the super simple and totally pretty Halloween Cards I made! I really wanted to use the patterned paper from the 12x12 kit and I thought I would keep it simple and use the rub-ons...then I thought the Glitter Alphas were just too pretty not to use!

First up is the "Happy Haunting" card I made:
Hocus Pocus Cards 1

I used back cardstock for the base of the card and then added the Witching Hour and Haunting patterned papers to it.  Next I added the Glitter Alphas and Rub-ons to the Good Fortune paper inked around the edges and used foam adhesive to attach it to the card base. I really love how the pretty glitter stickers make the sentiment stand out and how fast and easy the rub-ons were to use.
Hocus Pocus Cards 2

Aren't those just the prettiest Alphas?!?

Next up is the "Happy Halloween" card I made:
Hocus Pocus Cards 3

Again I used black cardstock for the card base. I added the Haunting paper and then added the chandelier rub-on to the upper right corner. I then made a ticket and added glitter alphas and rub-ons to create the sentiment. Finally I used a black zig pen to add faux stitching and create a "finished" look to the card. This was a a pretty simple card to make but I love how it turned out! The paper is just so pretty and I love how the rub-ons coordinate with the paper so well!
Hocus Pocus Cards 4
and again aren't the glitter alphas sooo pretty?

What do think? Want more posts like this? Feel free to leave me a comment and let me know!
And be sure to follow the blog so you don't miss the Giveaway announcement!! Pin It